Create a Workspace
What this chapter covers
Everything in PAVE happens inside a workspace folder. This chapter explains how to create a new workspace from the Workspace screen, how to open an existing folder, and what the four tabs of the project screen and the initial folder layout are for.
- Audience: users who have signed in and connected AI
- Prerequisites: signed in as in the previous chapter, with the Workspace screen showing
Create a new workspace
- At the top right of the Workspace screen (subtitle All the workspaces you have access to), click ① Create workspace. At first the list is empty and shows No workspaces yet.
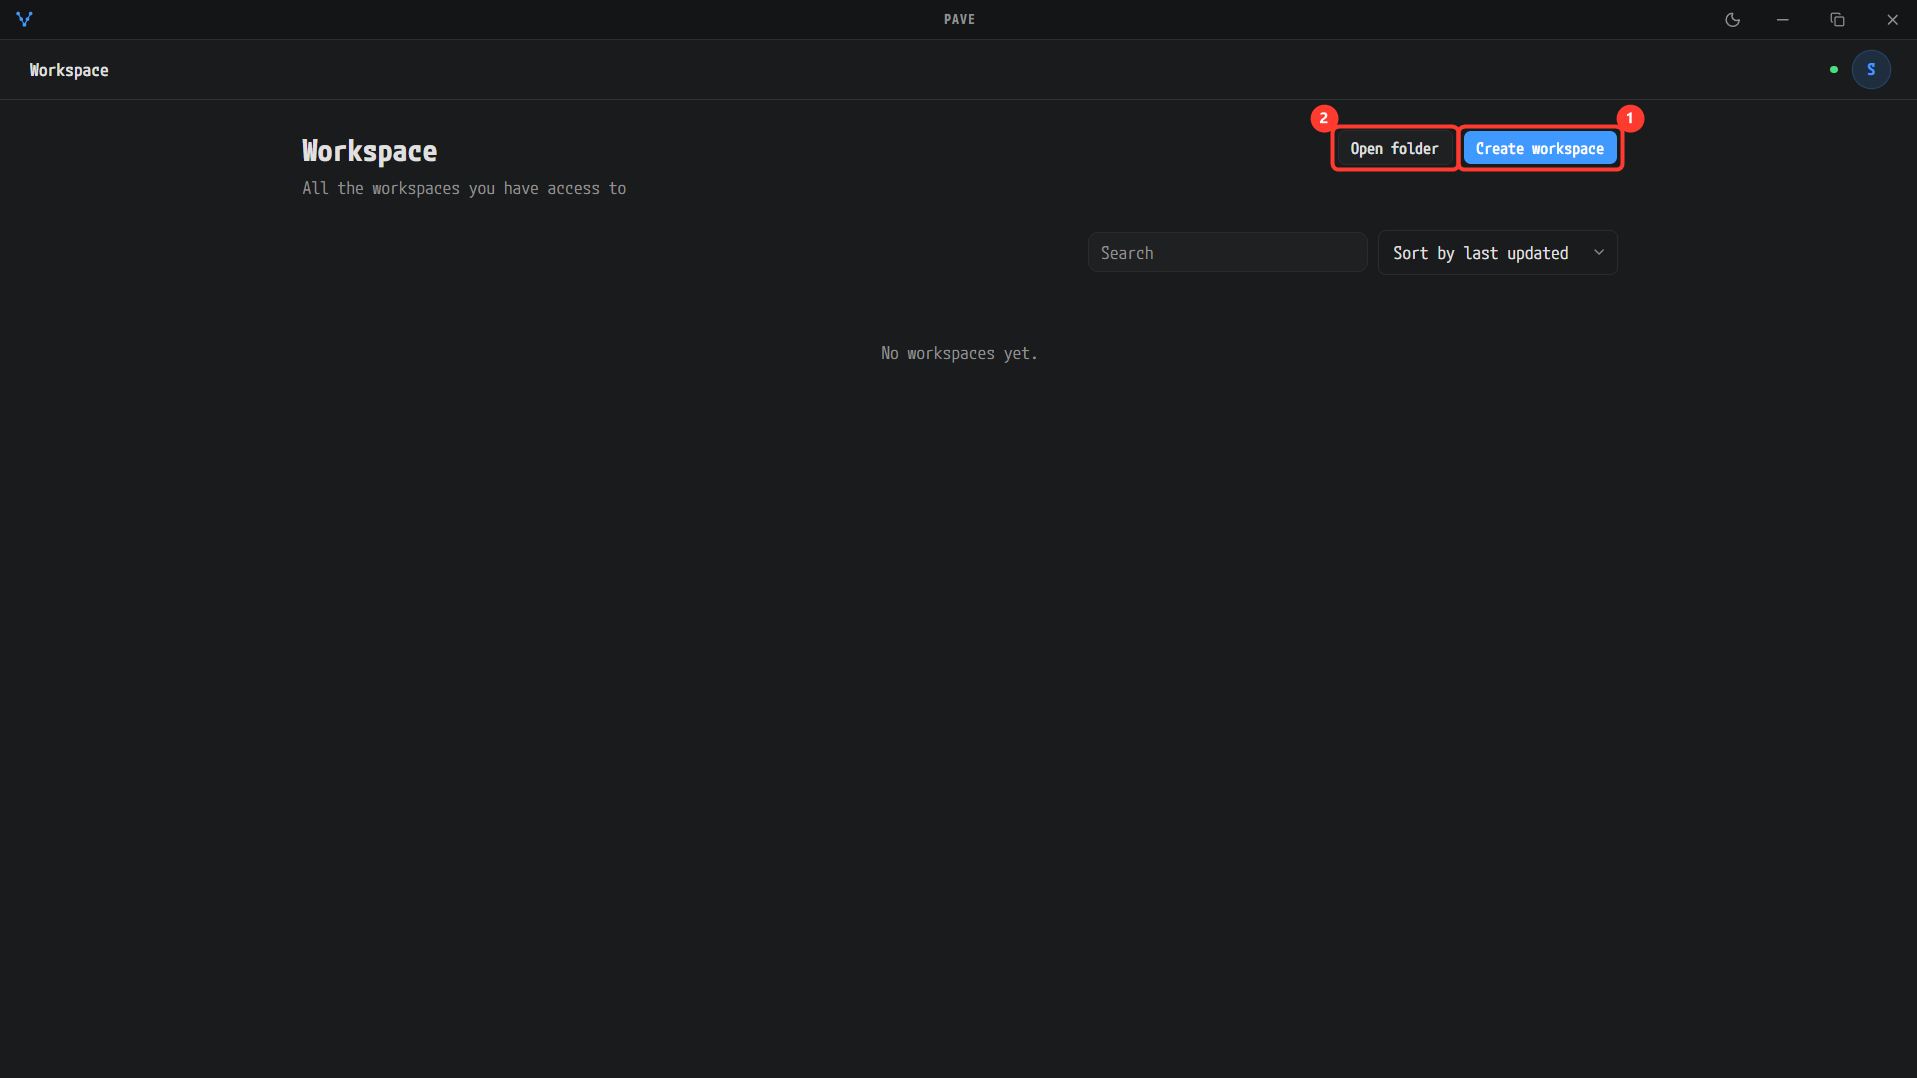
The Workspace screen right after signing in. There are no workspaces yet, so it shows No workspaces yet. ① Create workspace creates a new one and ② Open folder opens an existing folder. The green dot at the right of the header means AI is connected.
- In the New workspace dialog, type a name in ① Workspace name. The characters
\ / : * ? " < > |are stripped, and if the trimmed result is empty or is.or.., you get aninvalid nameerror. - Click ② Create. Once the name is non-empty the button shows a
Ctrl+Enterhint, andCtrl+Entercreates the workspace too.Esccloses the dialog.
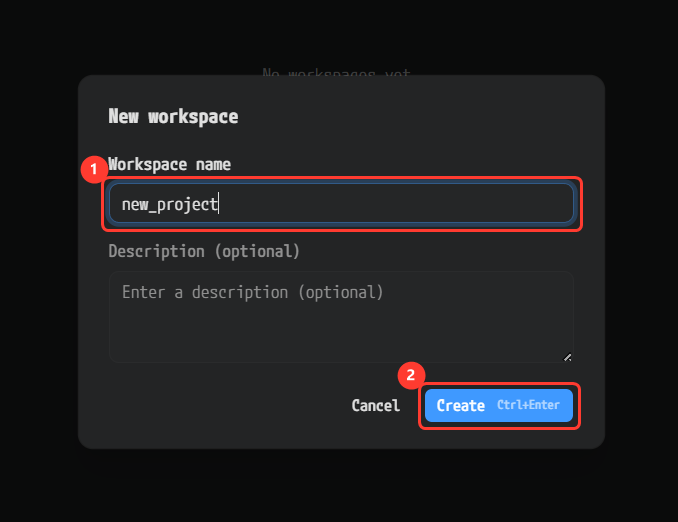
new_project has been typed into ① Workspace name. ② The Create button carries the Ctrl+Enter hint.
Description (optional) is not saved in the current version. Whatever you type there is not stored anywhere in the workspace, so you can leave it empty.
- A folder picker opens. Choose the parent folder for the workspace; the folder
<chosen folder>/<name>is created under it. There is no default location — the picker asks every time. If a folder with that name already exists there, you get ana folder with that name already exists hereerror.
The title of this folder picker is shown in Korean (
'<name>' 워크스페이스를 만들 위치 선택) in the current version.
Open an existing folder
Open an existing workspace folder with Open folder. Choose the folder in the folder picker (titled 기존 폴더를 워크스페이스로 열기) and it is registered in the list. Removing a workspace from the list does not delete the folder on disk.
The project screen and the initial folders
Once the workspace is created, you enter the project screen. It has four tabs at the top.
| Tab | Purpose |
|---|---|
| Files | Add input documents, convert them to Markdown, and view and edit the files in the workspace. |
| Knowledge | Build the knowledge base (ontology) from the converted documents and inspect it. |
| Workflow | Run the A-SPICE work product generation from the V-model. |
| Documents | View the generated document site once SWE.3 has finished. |
The tree on the Files tab starts with the following (created on both create and open; only missing items are added).
| Item | Purpose |
|---|---|
Inputs/ | The source originals you supply |
Outputs/ | The AI-generated work products |
Templates/ | One template per work product (<Doc>_Template_en.md, <Doc>_Template_ko.md) |
Wiki/ | The converted Markdown (Wiki/raw/) and the knowledge pages the ingest writes |
schema.md | The ontology schema that grounds the ingest. Written only when absent, so you can evolve it yourself. |
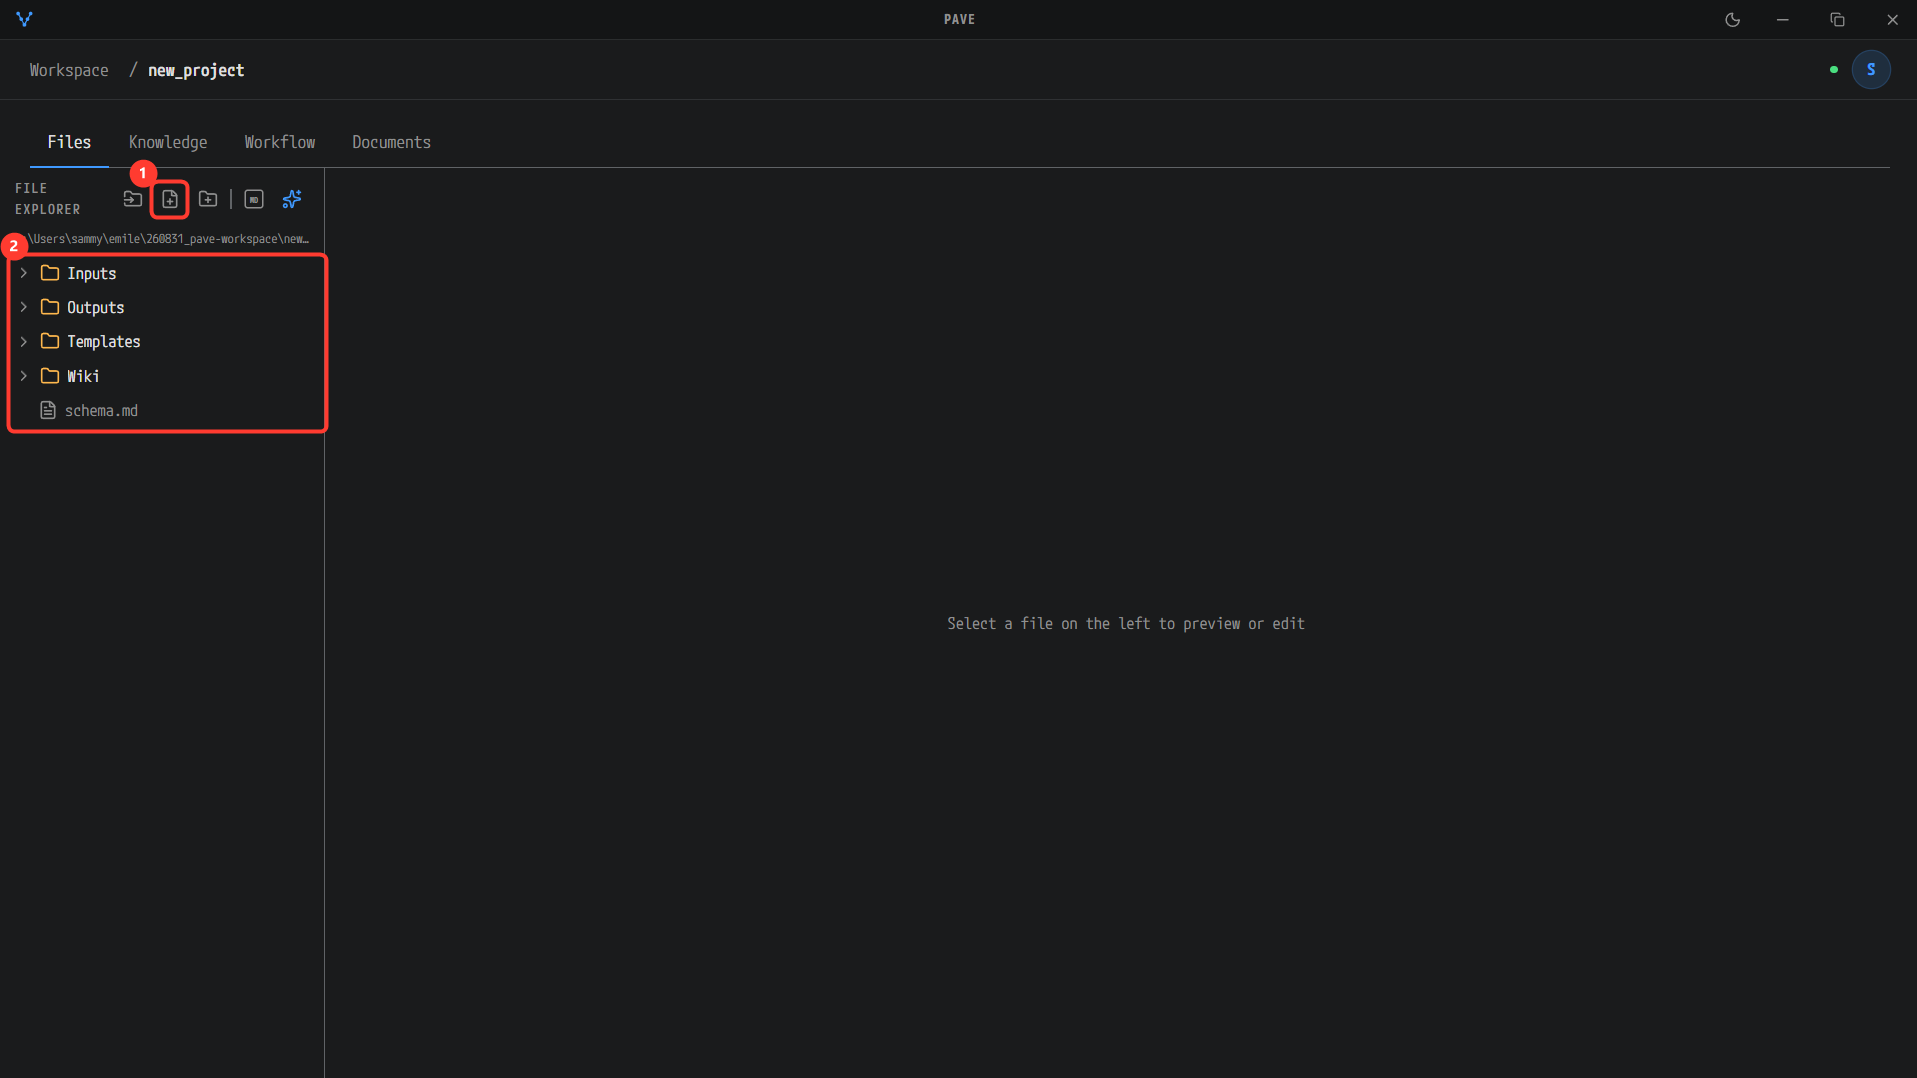
The Files tab of the new workspace new_project. The Files / Knowledge / Workflow / Documents tabs are at the top, and ② the tree already contains the Inputs, Outputs, Templates and Wiki folders and schema.md. ① The Import Files icon in the toolbar is used in the next chapter.
Next steps
The workspace is ready. Go to Upload Inputs and Convert to Markdown to put a specification PDF into Inputs/ and convert it.