Getting Started
This guide walks through the minimal steps from a freshly installed PAIO to an open System editor.
Install and Sign In
Install PAIO and sign in as described in Installation, Login and License.
A Window with No Project
When no project is open, the title bar reads PAIO and the editor area shows the Welcome tab (Welcome to PAIO) with the buttons New Project, Open Project and Connect to…. The EDITOR view on the left reads No project open and offers an Open Project button.
The same commands are in the PROJECT menu: New Project..., Open Project... (Ctrl+O), Open Recent, New Window (Ctrl+Shift+N), Save (Ctrl+S), Save All and Exit (Alt+F4). New Project... has no shortcut.
Create a Project
- On the Welcome tab, click New Project (or choose
PROJECT ▸ New Project...). - In the New Project dialog, type the project name into Name.
- Set Location to the folder that will hold the project, or click Browse… to pick it.
- Check the line below the fields,
The project will be created in <Location>\<Name>, and click Create.
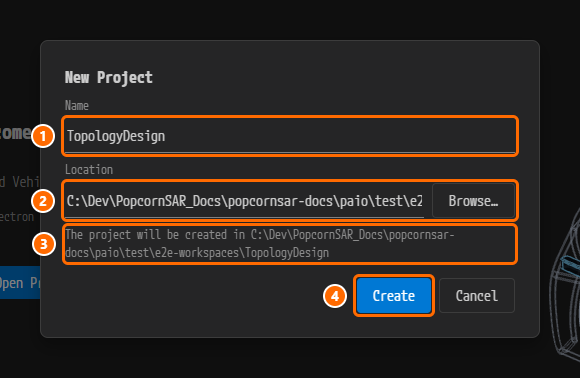
The New Project dialog. ① Name, ② Location and the Browse… button, ③ the line that names the new project folder, ④ the Create button.
PAIO creates the folder <Location>\<Name> and opens it as the window's project. The title bar changes to PAIO [<Name>], and the EDITOR view header reads EDITOR: <Name> with DESIGN and MODULE expanded.
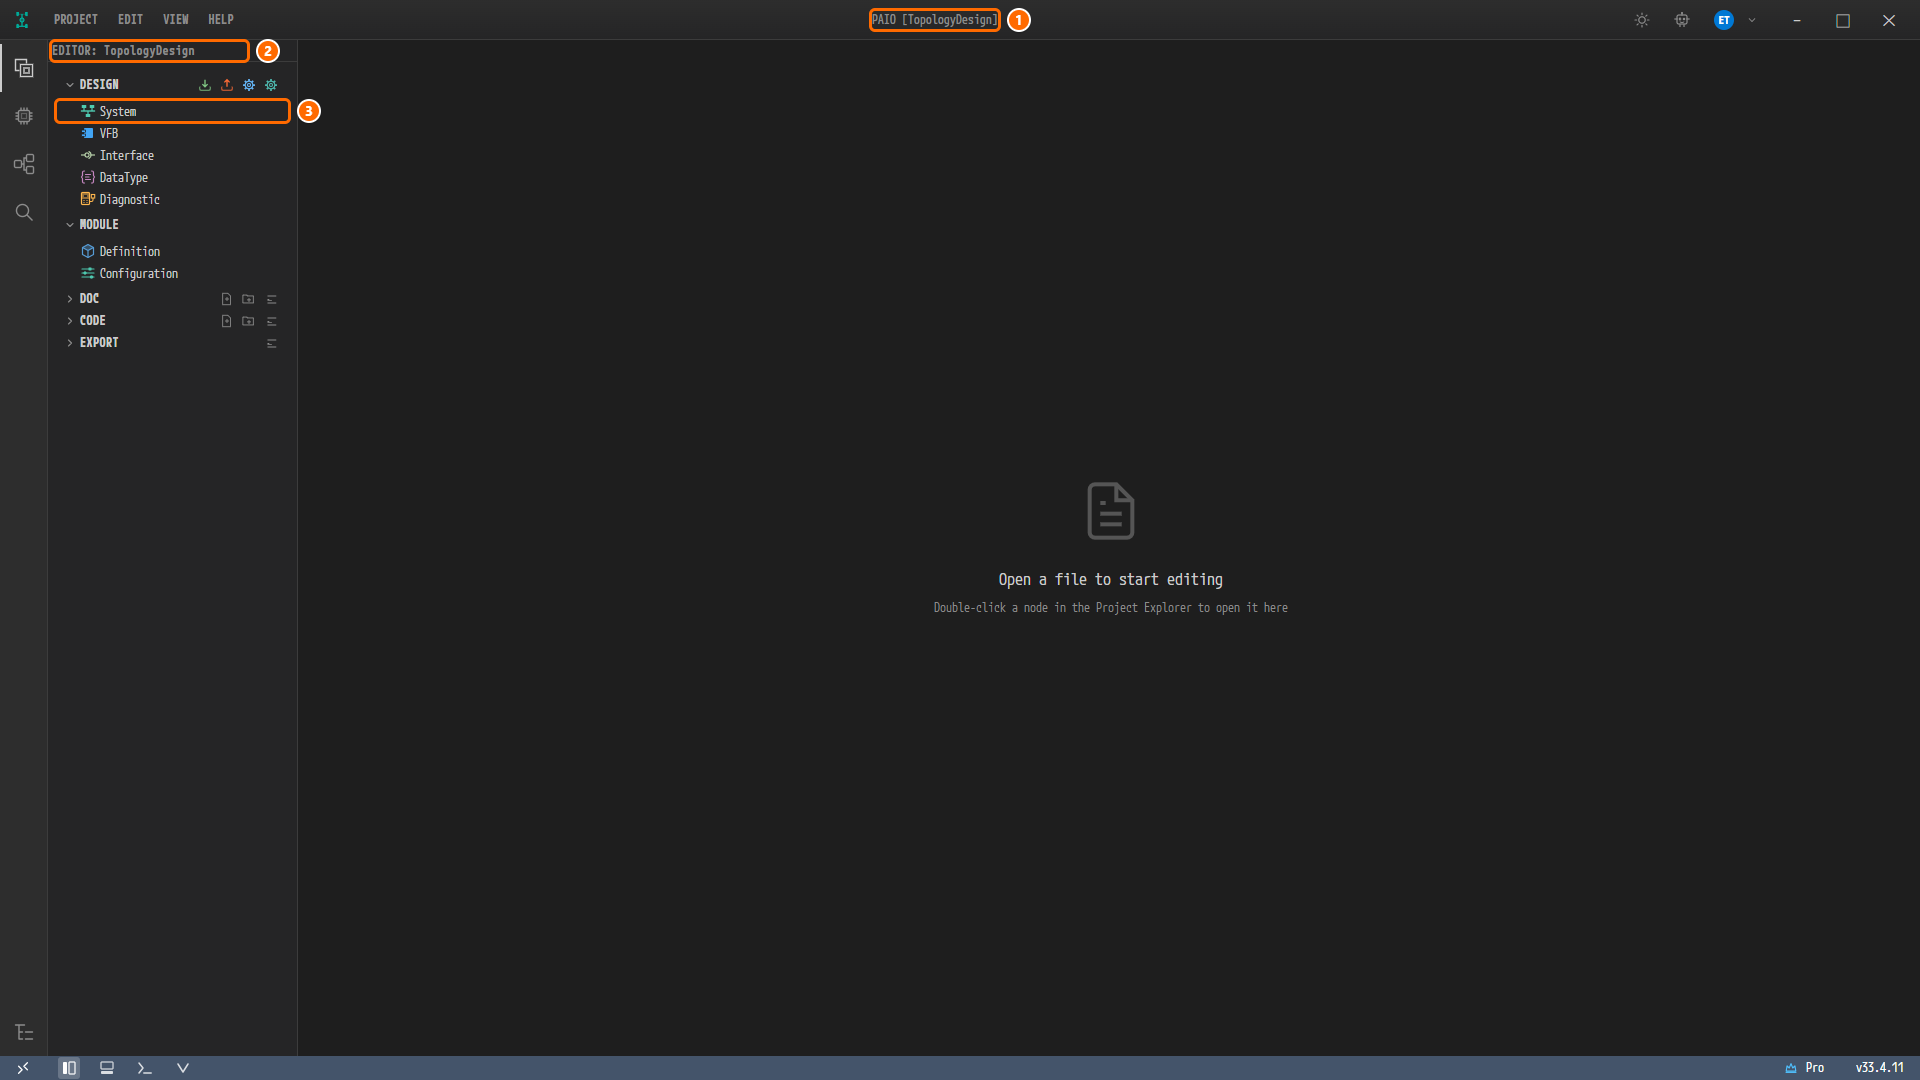
The window right after Create, for a project named TopologyDesign. ① The title bar PAIO [TopologyDesign], ② the view header EDITOR: TopologyDesign, ③ System under DESIGN. Until you open an editor, the editor area shows only Open a file to start editing.
Open the First Editor
In the EDITOR view, click System under DESIGN. The System editor opens in the tab <Name>:System. The other design editors open the same way from their rows under DESIGN and MODULE; see Editors.
Next Steps
- Workspaces and Projects: creating and opening projects in detail.
- UI Guide: the parts of the application window.